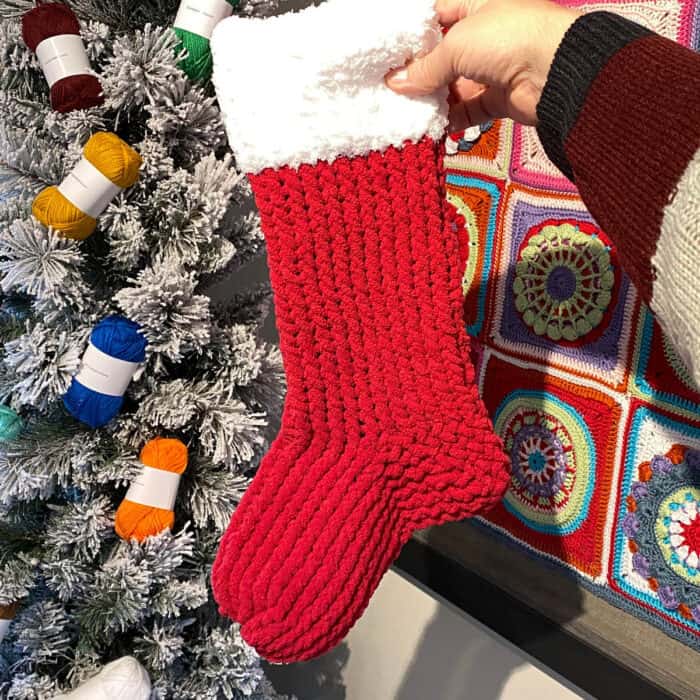
Felted Crochet Christmas Stocking
If you love felting, you will love this project. Crochet the stocking as usual and then put the stocking through the felting process. It will shrink the stocking by one third and will compress the stitches in tight. Looks really sharp when done. Mikey loves felting, maybe you do too?
This Stocking is completed in a continuous circle with no slip stitching between each row after the first row. This will prevent lines from appearing all the way up the stocking. Use a stitch markers will be able to tell you about how many times you rotated around to keep your count.
Using loom knitting skills during course lessons, it became apparent the turning a heel on socks is standard in order to achieve the proper shape. This would not work for real socks that this has been designed to have the perfect stereotypical bend at the bottom of the stocking to form an accurate looking sock.
Stocking dimensions are 8.5″ wide by 24″ long
Materials:
Size K Hook or 6.5 MM for a 24″ Long by 8″ Wide Stocking
Size I Hook or 5.5 MM For A 21″ Long By 8″ Wide Stocking
Yarn:
- Small Portion of Bernat Cream Softee Chunky White Yarn
- Small Portion of Bernat White Boa Yarn
- 1 Full Ball of Berry Bernat Super Value, 197 G or 7 oz yarn ball
Definitions:
Fuzzy Top
- CH 56, Join with SL ST in beginning CH, place stitch marker. When joining, ensure you don’t twist up the chain.
- CH 1, and DC into each stitch.
- This time, begin DC right over the next layer instead of going back and forth. DC all the way around. Besure to move your Stitch Marker up so you can count your rotations because you will not be slip stitching to prevent lines from appearing on the surface of the stocking.
- rep dc
- rep dc – ADDED DURING FILMING
- rep dc, final 2 stitches of this rotation will be SC then SL, fasten off white.
Leg
- Fasten on red, SC first stitch then DC all the way around.
- Like before, DC over top the previous rotation and DC all the way around.
- DC all the way around.
- DC 2 TOG for the 1st stitch, Then DC all the way around.
- DC all the way around.
- 2TOG DEC then DC all the way around.
- DC all the way around.
- 2TOG DEC then DC all the way around.
- DC all the way around.
- 2TOG DEC then DC all the way around.
- DC all the way around.
Heel Formation
- DC 12 Stitches, final 2 TOG DEC, turn around.
- CH 2, 2 TOG DEC, then DC all the way to the centre of the heel, then go to the 12 Stitch, then 2TOG DEC, Turn Around.
- * CH 2, 2 TOG DEC, then DC all the way back but 2TOG on the final stitch stitches and turn around.
- Repeat Step 3 (Each time your heel will be getting smaller as you eliminate stitches with each pass with the 2TOG DEC stitches.
- Repeat Step 3
- Repeat Step 3
- Repeat Step 3
- Repeat Step 3
- Repeat Step 3
- Repeat Step 3 and don’t turn around.
Foot Formation
At this point, your are finished the heel. I don’t want you to turn around. I want you to continue in the same direction and DC all the way around. You will need to look carefully at the 2TOG stitches as you will be putting in DC into the side part of the stitches because of the way the heel was formed. You will need to create your own stitches at a regular increment until you get to the front of the stocking where the stitches are again available.
Continue DC all the way around. Take note in the above paragraph.
- DC all the way around.
- 16 DC in row, SK 1 Stitch, then 24 DC, then SK 1 stitch and continue DC to the starting point.
- DC to the SK Stitch and again skip over the same spot, DC to the next SK and SK again, then DC to the back of the heel.
- Repeat Step 4
- Repeat Step 4
- DC all the way around.
- DC allthe way around.
- DC all the way around.
- DC to 1/4 around to put a 2 TOG DEC in, then DC to the 3/4 around to put in another 2 TOG DEC again, DC to the back of the heel.
- DC all the way around but match the 2 TOG DEC over top of each other to form a consistent decrease.
- Repeat Step 11
- Repeat Step 11
- Repeat Step 11
- DC to between the half way point between the start and first 2 TOG DEC below in row 10 and put in a 2 TOG DEC. Continue to DC and then Match the 2 TOG Dec over top of the one in row 10, Continue to DC again and place another 2 TOG DEC between the last 2 TOG DEC in row 10, continue to DC and match the 2 TOG Dec, finally at the half way point between the final 2 TOG DEC and back of heel place another 2 TOG DEC and DC remaining. You should have had 5 TOG DEC stitches on this row.
- DC all the way around matching the 2 TOG DEC over top of each other.
- Continue to 2 TOG DEC continually all the way around.
- Sew remaining shut if required and fasten off and weave ends in.
Now put through felting process and enjoy your new stocking.
©2011 The Crochet Crowd
My granddaughter asked me to make some christmas stockings for her last year I found your video and made three. One for her and her husband and their dog. Everyone liked them so much that my daughter wanted me to do three more for her family this year. I started to make hers early this summer and stopped when I got to the heel because it was in black and so hard to see. I have picked it up to try again but the video went to private and my heart sunk. I looked around and found your group and the written instructions. I hope the video is still available because I am not so good following written instructions, I thank you for the effort you put into making it .
Yea, where is the pattern for the Christmas candle cover? I really wanted to make my Christmas/Yule presents.
Diddo above. wrong link
Hi. If i wanted to make the stockings smaller and shorter, how do I make adjustments? i am wary of trying to just feel it out because of the decreases. This might alter the finished product. Thank you and I love how you detailed it in the video. I am usually confused if i only have to rely on written patterns.
I can’t find the Christmas candle cover pattern at this link: http://thecrochetcrowd.com/felted-christmas-stocking/. This link goes to a Christmas stocking.
The link for the Christmas candle cover pattern went here!!!! Help! That pattern is perfect for my needs…I’ve been searching for exactly this. I *could* figure it out on my own…but that might take awhile, lol. Thanks!