
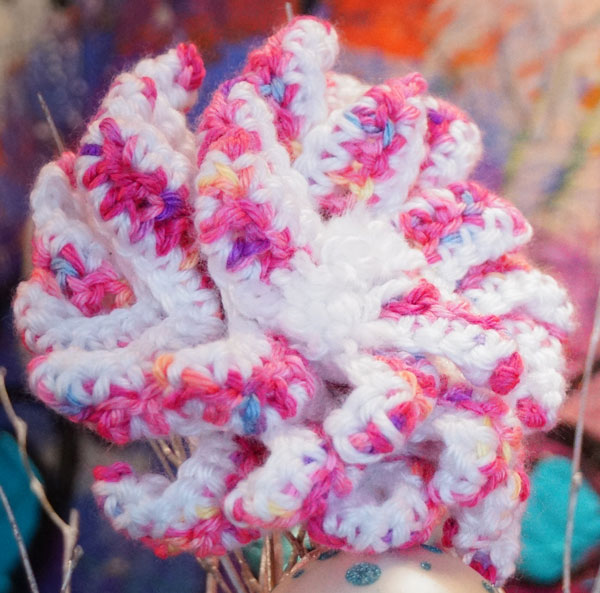
Multi-Layer & Adjustable Flowers
These fun and fabulous flowers resulted as a mistake when following a pattern on Red Heart Yarns. I wasn't understanding the pattern and went way out into the left field. Through messing up on the pattern, I started to improvise based on some thoughts I was having. Most flowers have this sense of being flat with a bit of 3D elements to it. I got to thinking why not explore with the 3D look and see where it goes.
This flower has several layers and is up to you how big you want to go. That's right, you can make your flower as big, or little, as you want it to be. The creativity is unlimited.

Pattern Suggestions
- Crochet Circle Takes the Square Blanket + Tutorial
- Crochet Yarn Thermometer Applique
- Crocodile Stitch Applique
- Crochet Baby Chunky Blanket Pattern
- Mikey's Wool Crochet Hat

Materials Needed
- 2 Skeins of Super Saver Red Heart Yarn or equivalent. These flowers don't use a lot of yarn and are great stash busters.
- 4.5 mm or G Size Crochet Hook
- Darning Needle for Finishing.
Instructions
These flowers work in a continuous circle from the base formation, petal creation and final trim.
Base of Flower
- Using main colour choice, Ch 4, join with a Slip Stitch to the beginning ch to form a ring.
- Ch 1, sc 8 times within the ring. Mark final sc with a stitch marker to be able to count the revolutions from here and throughout. You will work in a continuous circle so that your circle has a spiral effect. This is required for the petal creation. The stitch marker represents the final stitch for each revolution.
- Sc twice into the back loops each stitch going around. Move stitch marker up to the final stitch of this round.
- *Sc twice into the back loop next stitch, 1 sc into the next back loop stitch. Repeat * all the way around.
- *Sc twice into the back loop next stitch, 1 sc into the next 2 back loop stitches. Repeat * all the way around.
- *Sc twice into the back loop next stitch, 1 sc into the next 3 back loop stitches. Repeat * all the way around. On the final stitch Slip Stitch to and don't fasten off yarn.
Petal Creation
The circle is now ready to begin the petals. The front loops will have a definite line on the right side of the circle. The opposite side will not have any loops exposed. If you are right-handed, your circle should be turned facing up, showing the front loops. The front loops should start at the slip stitch and go left in a circle in a continuous spiral going to the center of your circle. If you are left-hand, from the slip stitch, your front loops should go toward the right and can be followed in a continuous spiral going to the center of the circle.
- * Ch 8, sc into the 2nd ch from the hook. hdc into the next, dc into the remaining chains. Skip 2 front loops on the circle and slip stitch into the next. Skip 1 front loop stitch on the circle and slip stitch into the next. Repeat * going into a complete spiral all the way to the center of the circle.
- If you would like the center to have an exposed circle showing the base, finish the petals 1 round before the center of the base. If you would like it to be full and not exposed, keep making petals until the entire base is filled up to the center point.
The petals will have a natural curl that comes up and turns back down. Each petal will have a spiral turn to it as well. This helps to create the petals to be random-looking and keeping the flower looking really full.
 Trim
Trim
The trim follows each petal. Due to the petals all being created in a spiral all the way around, the edging of each flower is connected to its neighbour. The trim makes the flowers even larger and plush.
- Fasten on where you started to slip stitch when you started the petals.
- Sc into each stitch onto the sides of the petals, which includes the top points. On one side of the petal, you will see stitches, on the other side you will sc in the spaces between posts as there aren't obvious stitches to crochet into.
- Follow the petals all the way around in a continuous circle base to the start of the flower.
- Slip stitch on the final stitch of the last petal at the center of the circle.
- Fasten off and enjoy your new flower.
kcjill says
Love it. Would like to see if a daylily can be crochet.