Living in the heart of Nova Scotia's Annapolis Valley which is known for its incredible falls and abundance of wineries, orchards and fall festivals, a large variety of pumpkins are grown here and shipped out. Our soil is ideal and pumpkins are easy to grow once they get started.
Two towns from us are Kentville, which has its annual Pumpkin People displays by the townsfolk. Each year, there is a theme that people aim for.
The town has a day where the people can gather to pick up complimentary cornstalks that make up the structure. The pumpkins are painted or decorated and positioned on top of the corn stalks.
Scarecrows are nothing new around our region and can inspire you on a creative basis.
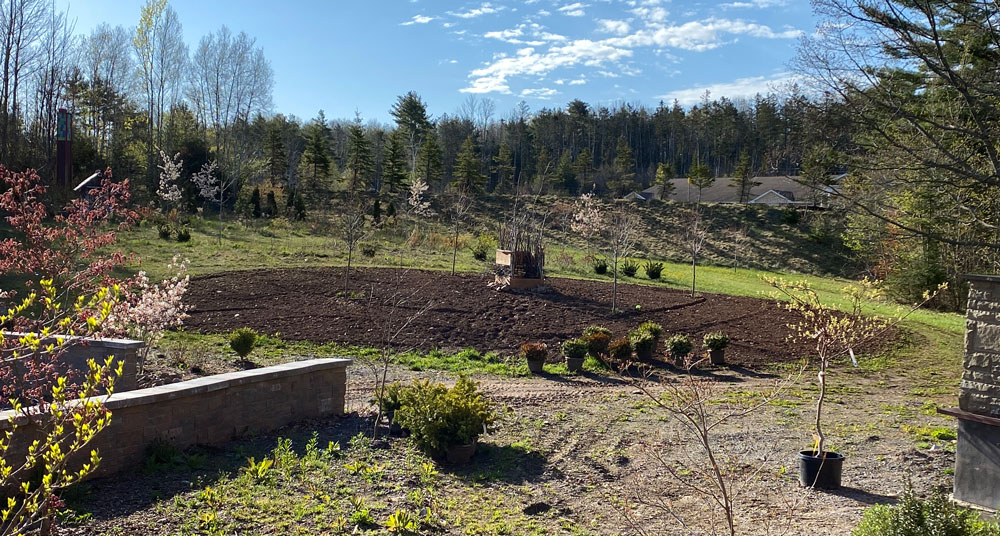
Mikey's Pumpkin Patch
We tried last year but didn't prepare the soil. Failed miserably. A portion of the pumpkins was started in April and then brought out. Most of the pumpkins, squash, sunflowers and broom corn and painted corn were planted as seeds. It's now May 25th and you can start to finally see the growth popping out of the soil.
I have 16 varieties of pumpkins and squash for decorative purposes for the fall. I have an assortment of gourds and 3 varieties of season-long strawberries planted as well. The painted corn will make for incredible decor.
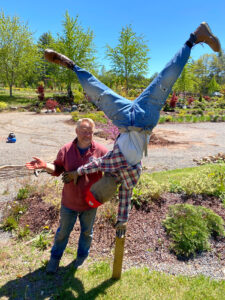
Cartwheel Scarecrows
To make this section of our grounds complete, I thought about a scarecrow but Daniel insisted it has to be creative and unexpected. He thought to put them in a cartwheel formation instead. Using unused clothing we have and spare 2 x 4" wood we already have.
And yes, if you think they are creepy, you are not alone.
I looked at photos of cartwheel scarecrows and really liked when the legs were not aligned to the main post going up. So the one arm and legs don't line up. So I wondered how to do that?
I wanted them to be our size, so I looked at our body structure and took measuring points. I pretended we are stick people and used spots on our bodies to take measurements.
You can download the schematic below. Just click it to save or print.
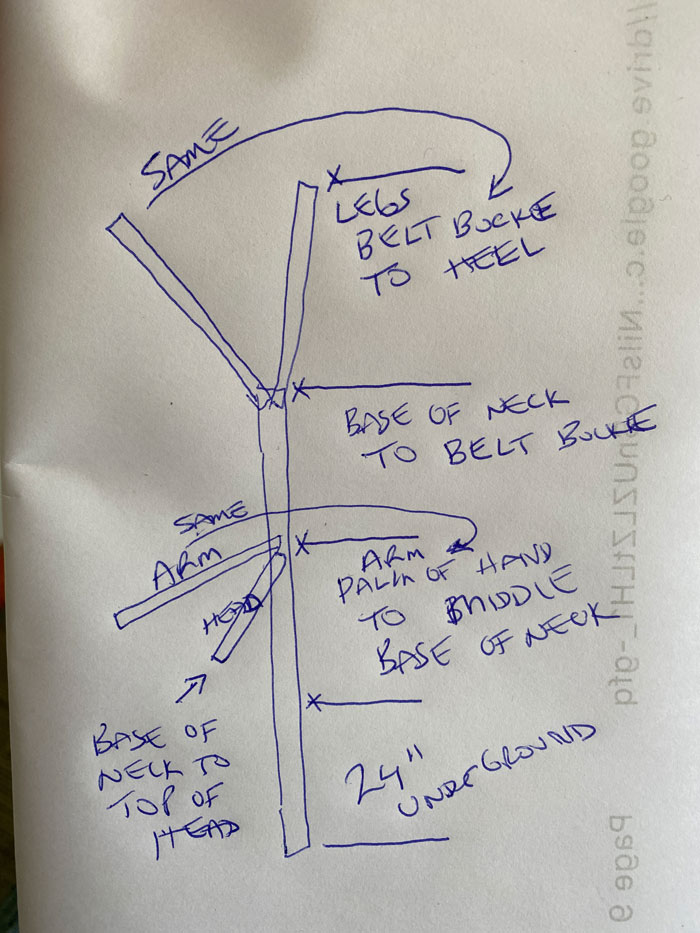
Main Beam
- In-Ground: You need the beam to go into the ground so it doesn't fall over, 24" inches should be enough.
- Arm Length: Hold hand above head and measure from the palm of the hand to base of the neck, for us, to our Adam's Apple. Write that down.
- Body: Measure from the base of neck to belt buckle area. Write that down.
For Daniel the main beam was 74" and mine was 78".
Arms
You already know the arm length from the main beam. It's the same measurement.
Head
Measure the base of the neck to the top of the head.
Legs
Measure from the belt buckle to the heel standing up.
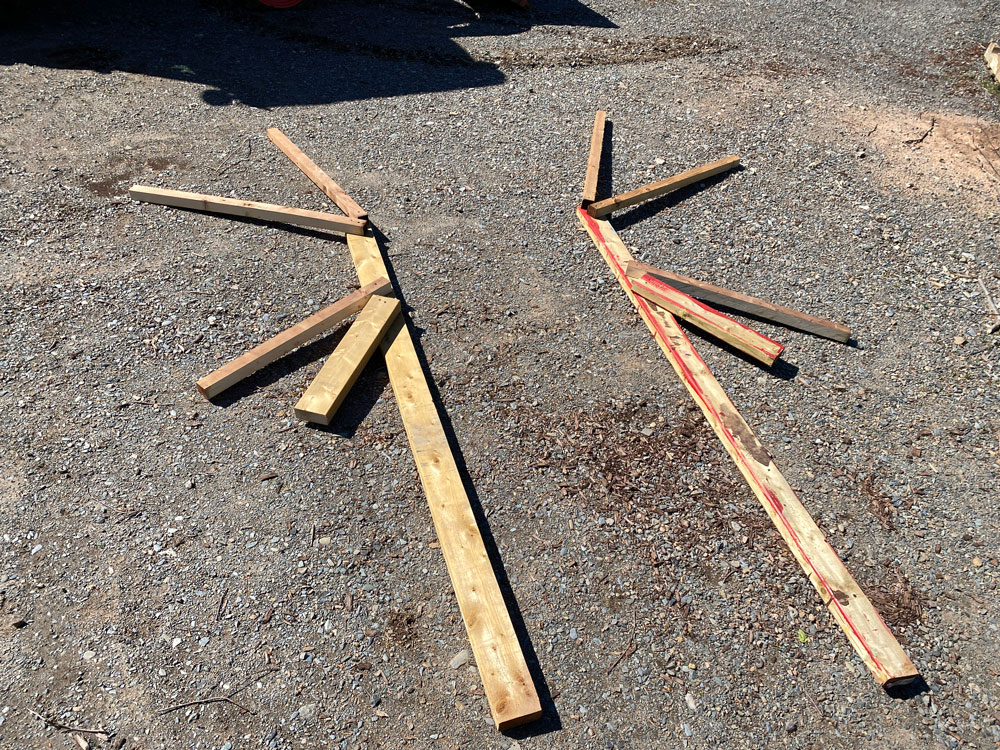
Cutting Tips
- Cut the lengths of the legs on 1 - 2x4.
- Then cut the width in half down the middle using a table saw.
- For the arms, the same thing. I cut the length longest arm on the 2x4 as you only need 1 per beam. Then cut that same piece width in half. Then cut the shortest arm from the new piece.
Main Beam Pivot Points
Position the pieces using the same measurements you got from the main beam.
- Mark the ground level.
- Mark the arm to the base of the neck.
- The legs will be at the top of the beam.
- Place just one screw in each piece at the marked spots. You need to slide on the clothes before getting these to be permanently positioned.
Sliding On Clothes
As I am positioning clothing, I am using a staple gun to hold the clothes to the beam.
- Start with pants by swivelling the legs together. Once pants are on, open the legs to your desired direction. Pull back the top of the pants and place another screw into the beam to permanently position the legs.
- My scarecrows are wearing socks, which the pants are tucked into. Secure stocks with pants tucked inside with a staple gun.
- Slide on a t-shirt, one armhole is the main beam itself. Sliding in the headpiece and arm into the clothing. Once confirmed, position the arms and head to the angle you wish. Peel back clothing and screw into the beams the second screw to hold their position.
- I also turned the structure over and screwed 1 extra screw from the back side as well.
- The one glove is slide into the end of the arm that is free. The other glove is part of the main beam and is stapled to the front of the beam.
- Using your own imagination, position boots or footwear to the top of the legs. Consider the left and right shoes are in the right spot. Also, position the angle of the shoes to your desired angle. I stapled them on.
Stuff the Scarecrow
I had extra plastic from the online orders I do. To keep the weight down, I didn't want the structure to be Polyfil. I only polyfilled the gloves. The rest is plastic packaging.
- I placed 1 garbage back inside each leg of the scarecrows. Then pushed the plastic packaging inside of that bag. The bags carry up beyond the waistline.
- Once the plastic is in, secure the t-shirt with a stable to the beam so it doesn't slide down.
- For realism, we decided to let the dress shirts fall down and are stapled into position so the entire shirt doesn't fall down.
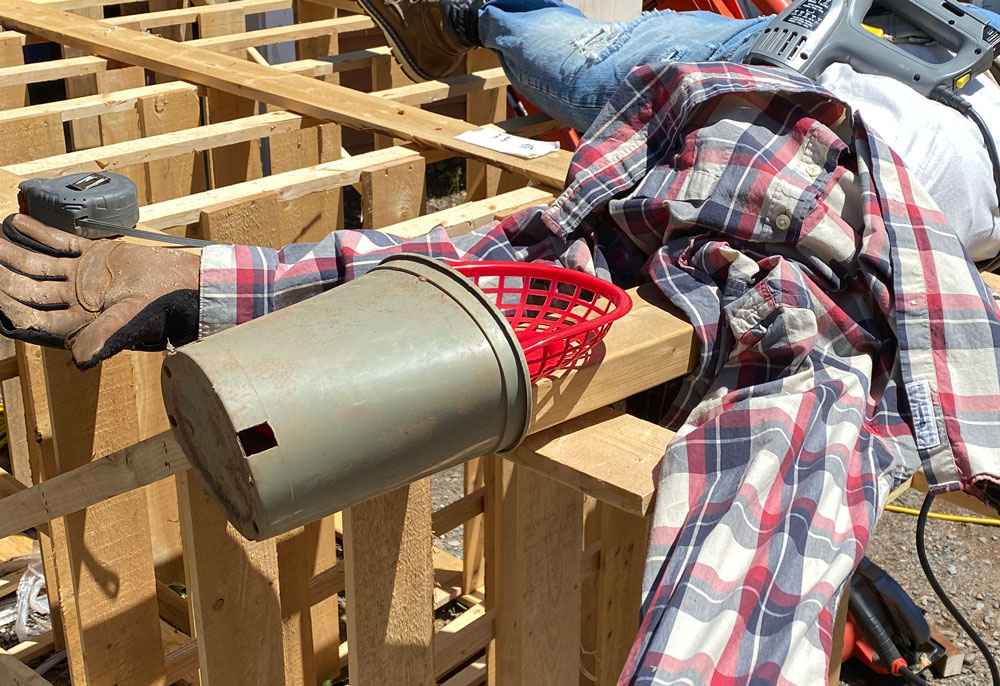
Head
The head is made up of a planter pot, a serving basket tray and burlap. You may be able to find something else in your kitchen or storage.
- I stapled a plastic serving basket to the head beam.
- Find a planter bucket that is about the size of a head. Slice 1 slit into the bucket so it can slide over the structure and serving basket.
- Then wrap the head 3 times with burlap. Shape it and secure it with staple gun.
- Place on a hat or whatever. Using a staple gun to secure.
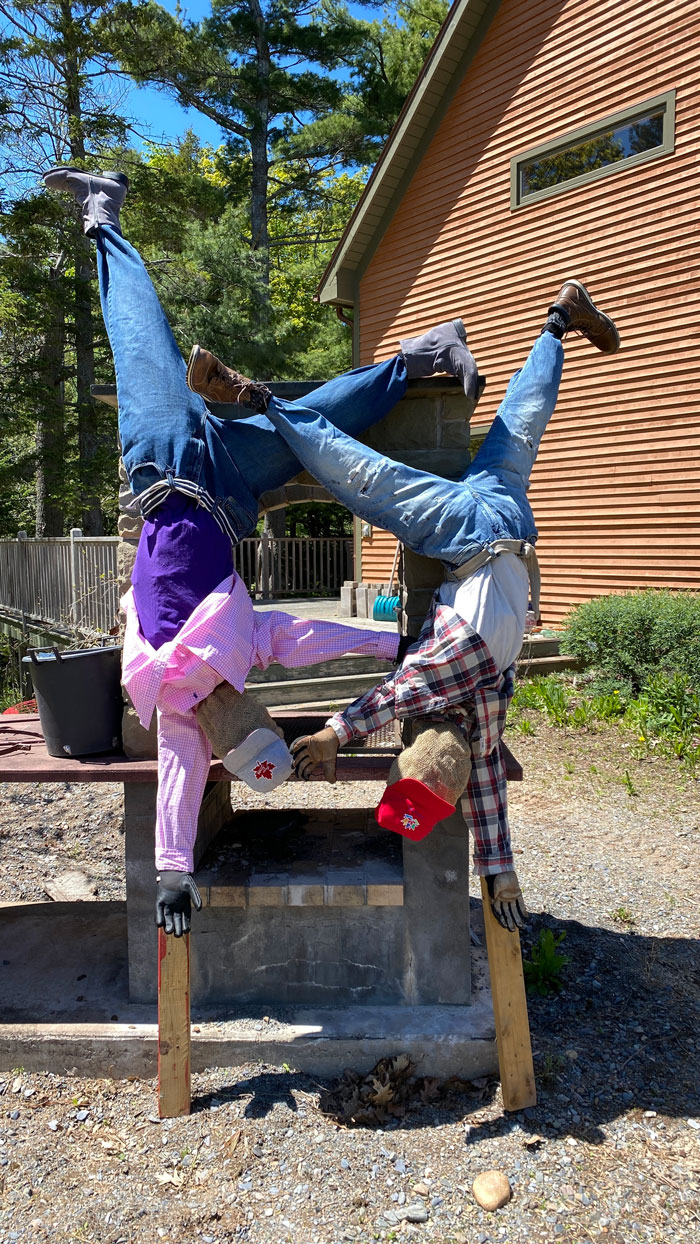
Add any accessories you wish to make it more personal. I find them creepy as it is, so I choose not to add a face as they already look real enough to me from a distance.
This did freak out PuppiDawg as they look so real. Once ready, position into your garden.
Maggie says
Tks for how to on cartwheel scarecrows. Hubby has agreed to help put one in our garden? SE Oklahoma. It's really fun! Well done 1 !